




Well, Blogger has done it to me again. For the past few months, most of you know that I've been dealing with a formatting issue, where I can no longer write my posts in Compose mode. I have to go only to html and write and then force all my formatting that you see on the posts: spacing, centering, links, etc. I've learned to live with it and have become very versed in html coding.
But, now I have a new blog problem that's really preventing me from creating new posts: My blog doesn't keep me signed in, and in effect doesn't even recognize me. So, starting on last Tuesday, I was no longer able to respond to comments on my blog nor go to other people's blogs and leave comments for them. To me, if someone leaves a comment for me and I don't acknowledge it, and if I don't show blogger-friendship and comment on their blogs, it's akin to being rude on my part.
Other people are still able to leave comments on my blog, unless they are experiencing the same problem I am. And, apparently, there are several bloggers who are having the same problem according to Bloggers own Known Issues site. I could still continue to post, but it would really bug me to not be able to respond. So, what I've decided to do is hold off on posting until Blogger can get this fixed. I will continue to check on their site to see if there are any updates from them. When they get this fixed, I will continue to post again. If they do not get this fixed, then I will have to look for another way to continue. I have so many more recipes to share; as a matter of fact, right now I have about a dozen recipes in the queue waiting their turn. This is very disappointing and frustrating to me because I really wanted this to be long-term, but I don't see any other way. In the meantime, I can still be reached through my email at blessedmama@pacbell.net.
I won't be able to respond to anything you say here on my blog, but I hope you all continue to flourish, enjoy good vegan food, and help save the world! I appreciate all the friendships that were starting to form, and I hope to be back posting soon.
Thank you,
BlessedMama :-)
Saturday, May 28, 2011


Friday, May 20, 2011
Bean and Facon Soup
Well, wasn't that fun? Experiencing almost two weeks of not being able to access my computer was an exercise in time well-spent otherwise. Now that most of the electrical problems in our home have been fixed by my sweet G (Happy Anniversary today!), I can blog again! Aren't we all happier now?
This soup is a take on my favorite canned soup from my childhood. I've tried remaking it a few times, as I do with my most of my dishes before I post them, and I think I've come up with a recipe that is strikingly similar, except for the cruelty to animals. G grew up with a mom who worked the swing-shift and retired from said canned soup company, and he thinks this version is spot on. My children have fortunately never tasted the inhumane original and love this. I have to say, my other tries, which were too dark and heavy, take a back seat to this lighter, well-balanced tasty bowl of goodness. This is definitely going on my menu board on the inside of my cupboard.

Bean and Facon Soup
Ingredients:
1 pound bag of Great Northern Beans
Water to cover
1 - 32 oz. box of Organic Imagine No-Chicken Broth
2 tsp. salt
1/2 tsp. pepper
1 pkg. of LightLife Smart Bacon, diced small
Directions:
Sort beans for grit and put in large pot with water a couple of inches over the beans. Cook on medium heat for one hour. Add broth, seasonings, and enough water to stay about an inch over the beans. Continue cooking on medium heat for another hour. When the beans are tender, add the facon, and cook for twenty minutes more. Can serve with crunchy bread and a yummy green salad. Feeds five hungry vegans.
This soup is a take on my favorite canned soup from my childhood. I've tried remaking it a few times, as I do with my most of my dishes before I post them, and I think I've come up with a recipe that is strikingly similar, except for the cruelty to animals. G grew up with a mom who worked the swing-shift and retired from said canned soup company, and he thinks this version is spot on. My children have fortunately never tasted the inhumane original and love this. I have to say, my other tries, which were too dark and heavy, take a back seat to this lighter, well-balanced tasty bowl of goodness. This is definitely going on my menu board on the inside of my cupboard.

Bean and Facon Soup
Ingredients:
1 pound bag of Great Northern Beans
Water to cover
1 - 32 oz. box of Organic Imagine No-Chicken Broth
2 tsp. salt
1/2 tsp. pepper
1 pkg. of LightLife Smart Bacon, diced small
Directions:
Sort beans for grit and put in large pot with water a couple of inches over the beans. Cook on medium heat for one hour. Add broth, seasonings, and enough water to stay about an inch over the beans. Continue cooking on medium heat for another hour. When the beans are tender, add the facon, and cook for twenty minutes more. Can serve with crunchy bread and a yummy green salad. Feeds five hungry vegans.
Thursday, May 5, 2011
GT Express Pizzas
So, I'm going to start out by saying that this is not an endorsement of the GT Express kitchen gadget. But, since it is a gadget that we use frequently in our home, especially the children, it seemed appropriate to post a meal using it. Just to note, we have the original, old GT Express, not the newer RediSetGo. I was going to order the new one for Mother's Day per G's prompting, but ended up dealing with a nightmare of a recording that kept insisting I needed every other product and trip and magazine available to man, which caused me to cancel my order. So, I love my old version but cannot vouch for the new one. Anyway, I love this thing (we actually have two) because the Blessings can make wraps, burritos and grilled cheese sandwiches without using the stove or oven.
We got small recipe books with our order several years ago, and I've been having fun trying to veganize them. I use that term loosely because it's not so much veganizing, as it is completely revamping a recipe. This latest one is my version of their pizzas, which turned out just great. I used my pizza dough recipe again, and with that recipe, we made sixteen mini pizzas: plenty for dinner and lunch the next day! Everyone got to have just the type of pizza they wanted. I'm not sure if there's something similar on the market, but it's a great way to make small dishes. The only drawback is with a family of five, one of us has to wait for our meal since there's only four wells (read: me). See below for a tasty recipe!


GT Express Pizzas
Ingredients:
Pizza dough, my recipe (click on link)
Various fillings - we used:
Organic pizza sauce
Follow Your Heart Vegan Gourmet, cheddar cheese style, finely grated
Gimme Lean Sausage, made into little meatballs and sauteed
Black olives, sliced into thirds
Fresh pineapple, diced small
Artichoke hearts, quartered and canned in water, sliced in half lengthwise
Mushrooms, halved and sliced
Directions:
Follow the recipe on making the dough, including the resting period. Plug in the GT Expresses. Take healthy-sized handfulls of dough, filling up your palm, and on a floured surface, roll slightly out a bit larger than the size of the well. Place in heated well, and spread a small amount of sauce and toppings on each pizza. Once both wells have dough and toppings, shut the lid and time for ten minutes. Comes out perfectly. Makes approximately sixteen mini pizzas, plenty for five hungry vegans for a couple of meals.
We got small recipe books with our order several years ago, and I've been having fun trying to veganize them. I use that term loosely because it's not so much veganizing, as it is completely revamping a recipe. This latest one is my version of their pizzas, which turned out just great. I used my pizza dough recipe again, and with that recipe, we made sixteen mini pizzas: plenty for dinner and lunch the next day! Everyone got to have just the type of pizza they wanted. I'm not sure if there's something similar on the market, but it's a great way to make small dishes. The only drawback is with a family of five, one of us has to wait for our meal since there's only four wells (read: me). See below for a tasty recipe!

GT Express Pizza

The size of the pizza dough ball you'll need for each pizza, about a palm-full

Two pizzas in their wells (with a touch of flour on the sides)
GT Express Pizzas
Ingredients:
Pizza dough, my recipe (click on link)
Various fillings - we used:
Organic pizza sauce
Follow Your Heart Vegan Gourmet, cheddar cheese style, finely grated
Gimme Lean Sausage, made into little meatballs and sauteed
Black olives, sliced into thirds
Fresh pineapple, diced small
Artichoke hearts, quartered and canned in water, sliced in half lengthwise
Mushrooms, halved and sliced
Directions:
Follow the recipe on making the dough, including the resting period. Plug in the GT Expresses. Take healthy-sized handfulls of dough, filling up your palm, and on a floured surface, roll slightly out a bit larger than the size of the well. Place in heated well, and spread a small amount of sauce and toppings on each pizza. Once both wells have dough and toppings, shut the lid and time for ten minutes. Comes out perfectly. Makes approximately sixteen mini pizzas, plenty for five hungry vegans for a couple of meals.
Monday, May 2, 2011
Easy Bagel and Deli Slice Breakfast
This is such an easy breakfast that it's not really a difficult recipe but more of another breakfast idea for you. I could have baked the bagels myself, and I could have made the deli slices by hand, but c'mon, we all need a break and have shortcuts sometimes, right? So, do yourself a favor, if you have a spare ten dollars, buy the bagels and some slices, and have a quick, easy and tasty breakfast. Just a tip: use the plain or savory bagels, not the sweet ones here.

Easy Bagel and Deli Slice Breakfast
Ingredients:
Bagels - plain or savory
Vegan margarine
Vegan deli slices from Yves or Tofurky or your favorite brand
Directions:
Cut the whole bagels in half. Toast them bagels. Spread a touch of margarine on each slice. Put a few deli slices on each bagel half. So good, so simple, so filling. Feeds five hungry vegans.

Easy Bagel and Deli Slice Breakfast
Ingredients:
Bagels - plain or savory
Vegan margarine
Vegan deli slices from Yves or Tofurky or your favorite brand
Directions:
Cut the whole bagels in half. Toast them bagels. Spread a touch of margarine on each slice. Put a few deli slices on each bagel half. So good, so simple, so filling. Feeds five hungry vegans.
Thursday, April 28, 2011
Grilled Cheese and Tempeh Facon Sandwiches
Here is another twist on the grilled cheese sandwich. In the past I used Smart Bacon strips, and there's nothing wrong with them as an alternative to bacon. But, I'm trying to get away from processed/pre-made foods more and more, little by little, so I thought I'd just make a simple version of facon with tempeh. I will still use Smart Bacon and other meal-helpers in dishes, don't get me wrong - I'm not going to be hypocritical. But, for this sandwich, tempeh worked great, and I like knowing my family will reap the health benefits as well.


Grilled Cheese and Tempeh Facon Sandwiches
Ingredients:
2 pkgs. of tempeh, cut into strips
2 tsp. of liquid smoke
1 Tbs. canola oil
Follow Your Heart vegan cheese, cheddar style, cut into strips
Vegan margarine
Good bread
Directions:
Heat the oil in a large skillet that has a lid (but don't use the lid yet) over medium heat. Put tempeh strips in a shallow bowl and sprinkle the liquid smoke over them. Toss the tempeh carefully with your hands to get the liquid smoke over as much of them as possible; you can massage it in gently. Fry the tempeh strips for several minutes until golden on both sides (do not use the lid here). Drain on paper towels to get any extra oil off. Put cheese slices on bread, and cover each slice with a strip of tempeh. Top with the other slice of bread. Spread margarine on the top slice of bread. Add about a tablespoon or so of margarine to the same skillet, and put in each sandwich unbuttered side down. Cover with lid and cook for five minutes over medium heat. Carefully flip each sandwich over with a large spatula, so the margarine side is down now. Cover with lid again, and cook for another five minutes. Serve while warm. Can be served with a hearty salad or lots of veggies on the side. Tasty. Feeds as many as you want, which is of course, five hungry vegans!

Grilled Cheese and Tempeh Facon Sandwiches with roasted veggies on the side

Easy sandwich preparation
Grilled Cheese and Tempeh Facon Sandwiches
Ingredients:
2 pkgs. of tempeh, cut into strips
2 tsp. of liquid smoke
1 Tbs. canola oil
Follow Your Heart vegan cheese, cheddar style, cut into strips
Vegan margarine
Good bread
Directions:
Heat the oil in a large skillet that has a lid (but don't use the lid yet) over medium heat. Put tempeh strips in a shallow bowl and sprinkle the liquid smoke over them. Toss the tempeh carefully with your hands to get the liquid smoke over as much of them as possible; you can massage it in gently. Fry the tempeh strips for several minutes until golden on both sides (do not use the lid here). Drain on paper towels to get any extra oil off. Put cheese slices on bread, and cover each slice with a strip of tempeh. Top with the other slice of bread. Spread margarine on the top slice of bread. Add about a tablespoon or so of margarine to the same skillet, and put in each sandwich unbuttered side down. Cover with lid and cook for five minutes over medium heat. Carefully flip each sandwich over with a large spatula, so the margarine side is down now. Cover with lid again, and cook for another five minutes. Serve while warm. Can be served with a hearty salad or lots of veggies on the side. Tasty. Feeds as many as you want, which is of course, five hungry vegans!
Monday, April 25, 2011
Black Tie Cheesecake
I call this Black Tie Cheesecake because it looks like it's all dressed up to go to a black tie event. I've made this cake about once a year for around the last ten years, and I love it every time. Whenever I am going to make it, I always think it's a big job, but then when I'm done, I always remember how easy it actually is. Then, I think, I should make this more often but never do. So now, perhaps by putting this all down here, maybe I'll actually make this delicious cheesecake more often. I first got the idea for the recipe off a free recipe card that was mailed to me, trying to get me to subscribe to recipe cards. I've veganized the recipe, changed the name, altered the amounts of the ingredients, and also tweaked some of the procedures of the recipe, as well, over the years. I'm confident that I can call it mine now.
I brought this as our contribution to Easter with all the relatives, along with my Tropical Seitan Pasta Salad, which has become pretty much the dish that everyone expects me to bring now: they love it so much. My mom provided Gardenburger riblets for us, and I also brought rolls. I once made the salad with something else for dinner for my parents, along with this cheesecake for dessert, and my dad told my mom later that that was one of the best meals he had ever had. From my dad, that's a huge compliment. I hope you enjoy this basically easy, but beautiful dessert, as well.


Black Tie Cheesecake
Ingredients:
Crust:
1 pkg. Newman O's chocolate sandwich cookies
1/2 cup of vegan margarine
Cheesecake:
3 pkgs. of Tofutti cream cheese, room temperature
1 cup of vegan sugar
3 Tbs. EnerG Egg Replacer
10 Tbs. water
1 8oz. box of Bakers semi-sweet chocolate, divided (2 oz.)
Frosting:
The remainder of the Bakers chocolate (6oz.)
1/2 cup of Tofutti sour cream
Directions:
For the crust: Scrape all the cream centers out of each cookie and set aside for a later meal or for present gluttony. Grind the chocolate cookie "jackets" in a food processor. Melt the margarine. Combine them both in a bowl and mix well. Press into the bottom of a nine-inch springform pan. Smooth out with the back of a spoon.
For the cheesecake: Preheat the oven to 325 degrees. In a mug or measuring cup, whisk together the Egg Replacer and water with a fork or small whisk. In a medium bowl, combine the cream cheese, sugar, and Egg Replacer and water mixture. Beat on medium speed until well blended, two to three minutes. Pour half of the mixture over the cookie crumb crust. Melt two wrapped squares of the chocolate. Stir into the rest of the cheesecake mixture in the bowl. Pour evenly over the white bottom layer in the pan. Place pan on cookie sheet, and bake for one hour. Remove from oven. You don't want any cracks in the top of the cake: that could mean that it is too dry. If it's a little jiggly in the center, that should be okay; it will probably continue to set up while cooling on the rack and chilling in the fridge. But, most likely, it will appear pretty solid with the one hour baking time. Cool completely on cooling rack, then continue to chill for a few hours in the refrigerator.
For the frosting: When the cake is completely cold, remove from the refrigerator, and place the pan on a serving platter. Take a butter knife and gently run it along the edge of the cake to loosen any last parts of the cake from the pan. Remove the sides of the springform pan. Now, it's time to prepare the frosting. Melt the rest of the chocolate squares (6 oz.). Put in a small mixing bowl and add the sour cream. Mix well. Use a spatula or a non-serrated butter knife to spread the frosting on the top and sides of the cake. The sour cream adds just enough softness to the chocolate to spread it but leaves the chocolate firmer than regular cake frosting. Place back in the refrigerator and continue to chill for at least an hour before serving. Can be served cold from the fridge or after setting out for about twenty minutes. Longer than that can make the cake too soft. If you find that the crust is wanting to stick to the bottom of the pan, gently run a butter knife under the crust all the way around, to loosen it from the pan. This has only happened to me once, though. This is so good. Feeds five hungry vegans and several relatives.
I brought this as our contribution to Easter with all the relatives, along with my Tropical Seitan Pasta Salad, which has become pretty much the dish that everyone expects me to bring now: they love it so much. My mom provided Gardenburger riblets for us, and I also brought rolls. I once made the salad with something else for dinner for my parents, along with this cheesecake for dessert, and my dad told my mom later that that was one of the best meals he had ever had. From my dad, that's a huge compliment. I hope you enjoy this basically easy, but beautiful dessert, as well.

Black Tie Cheesecake

Cookie Crust
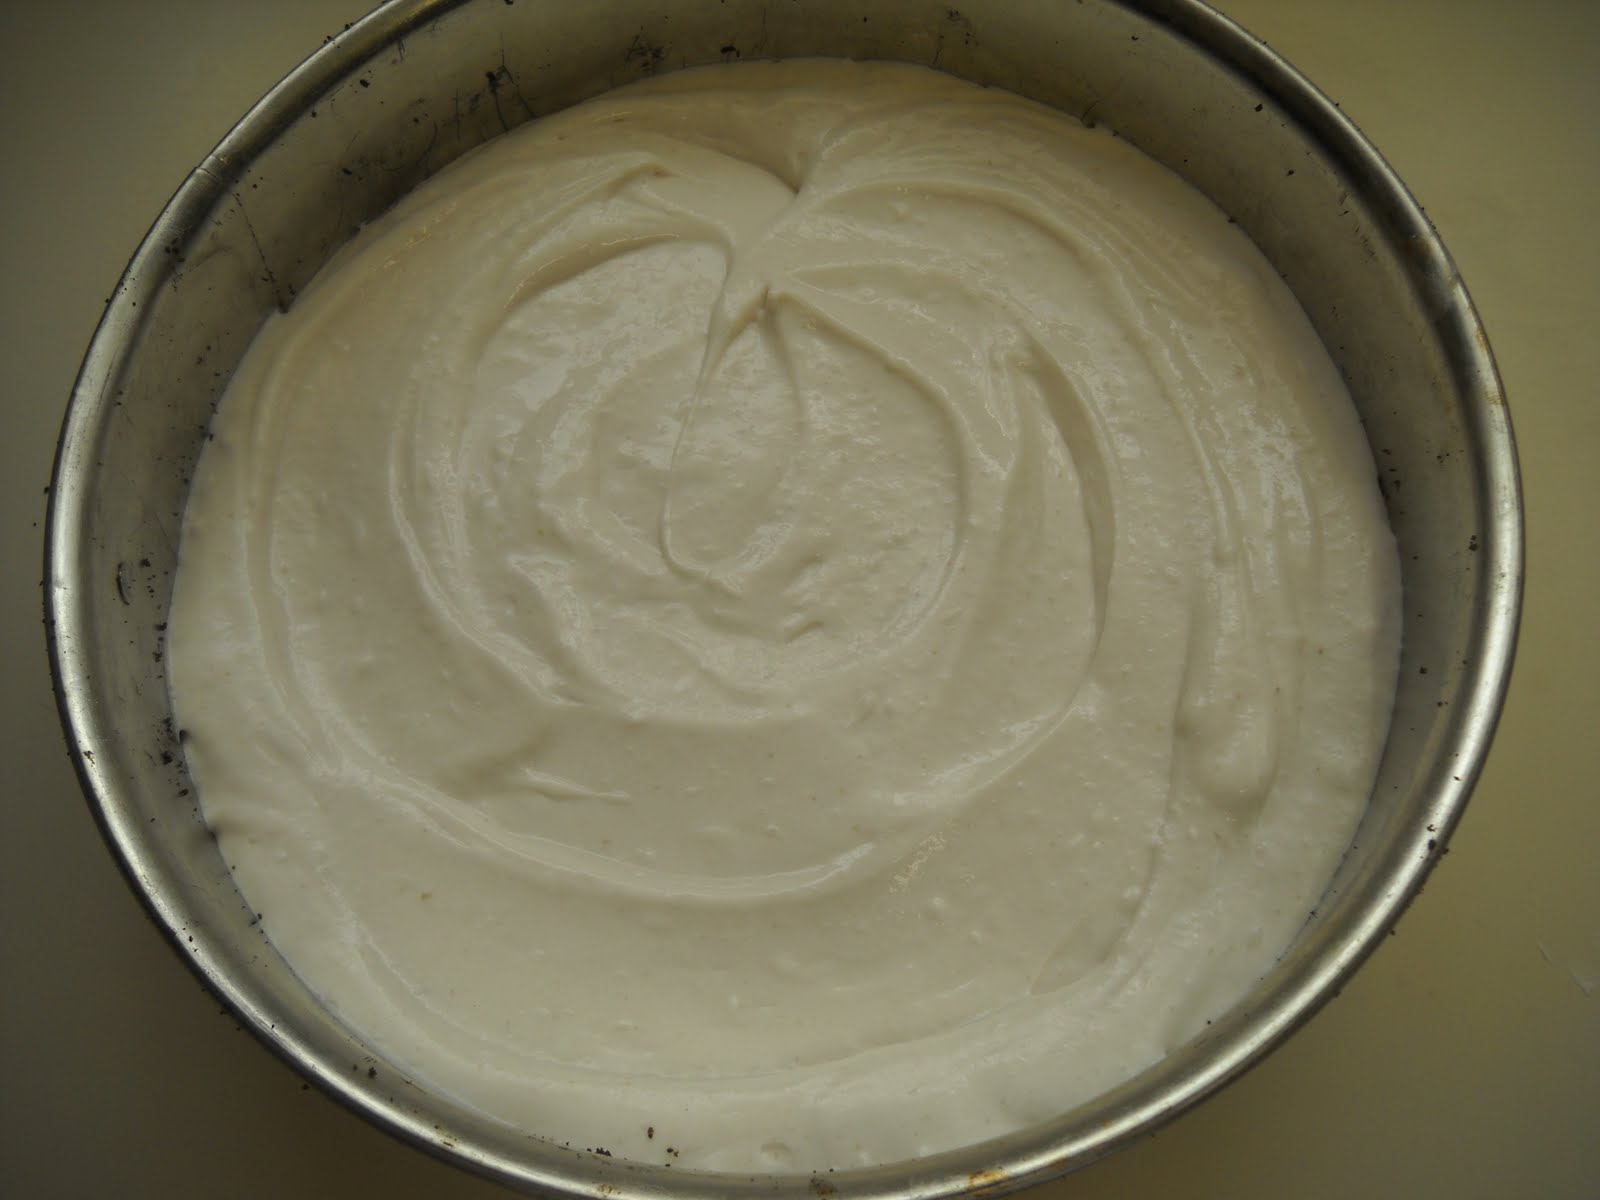
White layer of the cheesecake
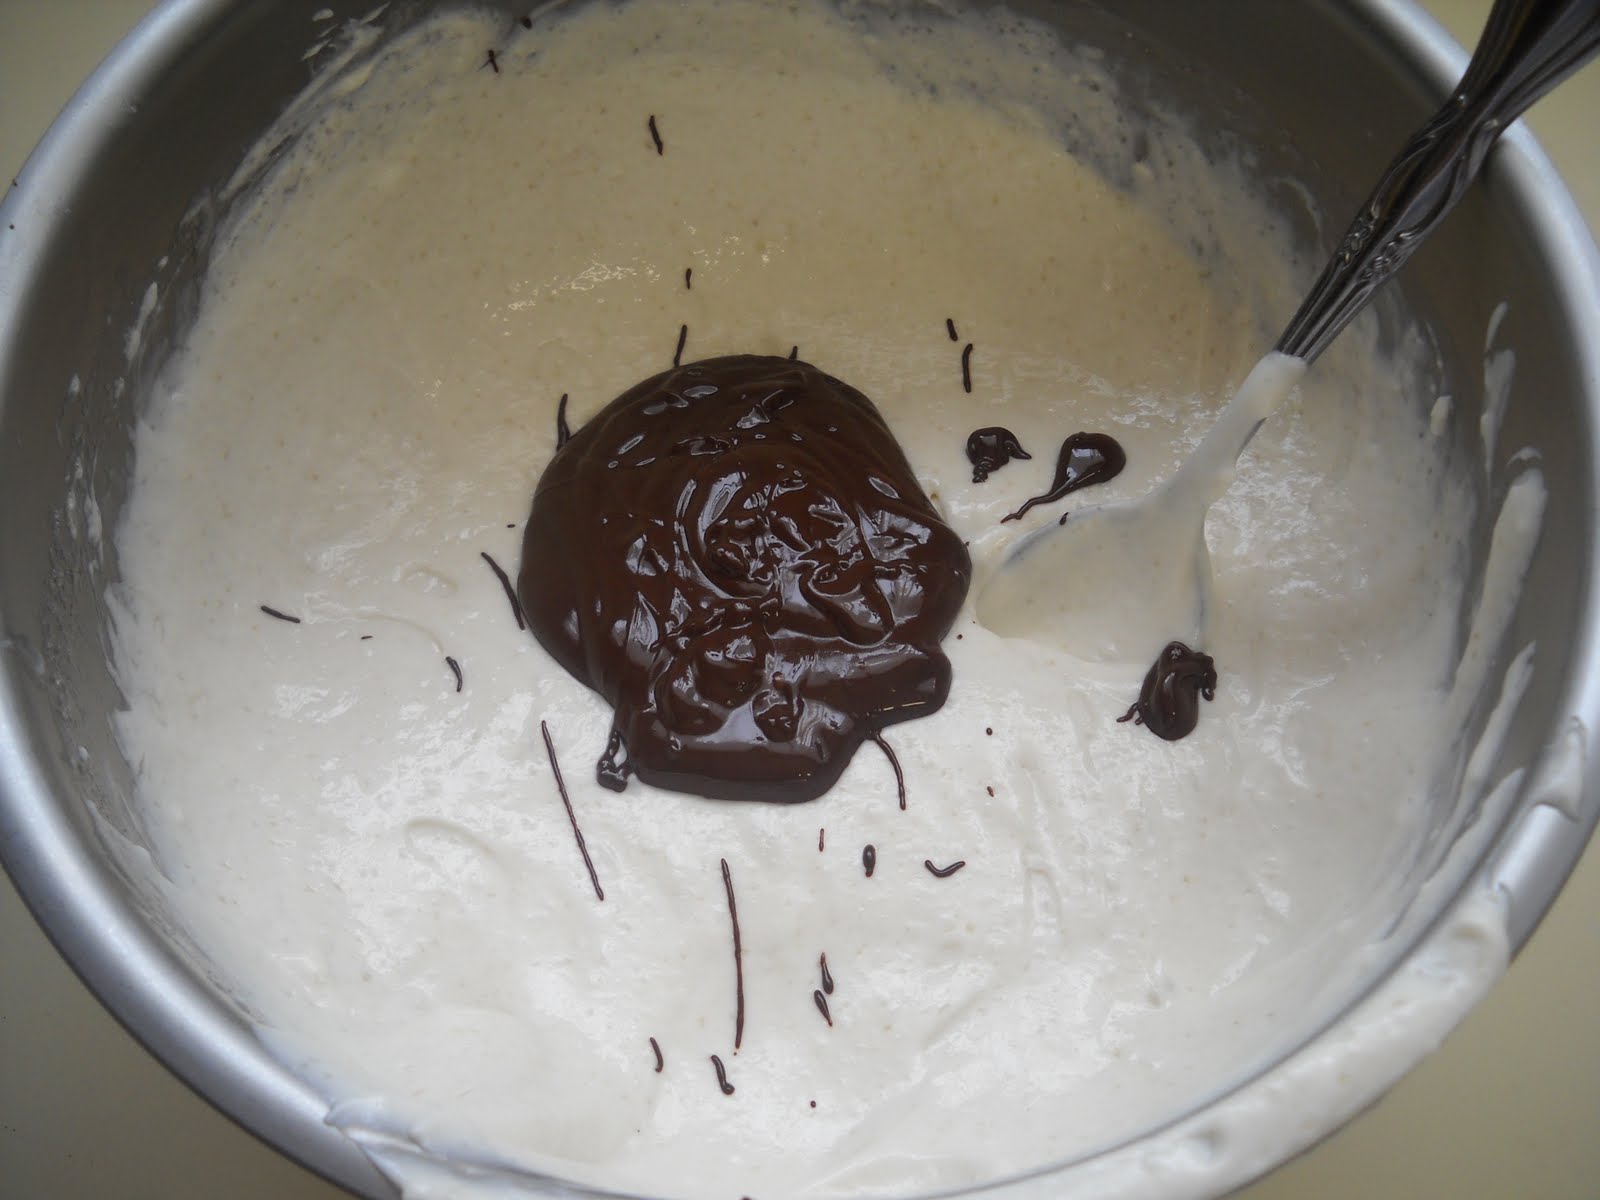
Getting ready to mix in the chocolate into the second half of the white cream cheese blend

Chocolate layer of the cheesecake

Here the baked cheesecake has been cooling for about twenty minutes. You can see that the edges are already starting to pull away from the pan. When it's completely cool, you will gently run a butter knife around the edge to ensure that it's separated all the way.

Preparing to mix in the sour cream into the melted chocolate to make the frosting

Here is the cheesecake with the sides of the springform pan removed. The frosting is patiently waiting to be spread.

The frosted cheesecake - ready to be chilled in the fridge

What was left of the Black Tie Cheesecake after the relatives got ahold of it
Black Tie Cheesecake
Ingredients:
Crust:
1 pkg. Newman O's chocolate sandwich cookies
1/2 cup of vegan margarine
Cheesecake:
3 pkgs. of Tofutti cream cheese, room temperature
1 cup of vegan sugar
3 Tbs. EnerG Egg Replacer
10 Tbs. water
1 8oz. box of Bakers semi-sweet chocolate, divided (2 oz.)
Frosting:
The remainder of the Bakers chocolate (6oz.)
1/2 cup of Tofutti sour cream
Directions:
For the crust: Scrape all the cream centers out of each cookie and set aside for a later meal or for present gluttony. Grind the chocolate cookie "jackets" in a food processor. Melt the margarine. Combine them both in a bowl and mix well. Press into the bottom of a nine-inch springform pan. Smooth out with the back of a spoon.
For the cheesecake: Preheat the oven to 325 degrees. In a mug or measuring cup, whisk together the Egg Replacer and water with a fork or small whisk. In a medium bowl, combine the cream cheese, sugar, and Egg Replacer and water mixture. Beat on medium speed until well blended, two to three minutes. Pour half of the mixture over the cookie crumb crust. Melt two wrapped squares of the chocolate. Stir into the rest of the cheesecake mixture in the bowl. Pour evenly over the white bottom layer in the pan. Place pan on cookie sheet, and bake for one hour. Remove from oven. You don't want any cracks in the top of the cake: that could mean that it is too dry. If it's a little jiggly in the center, that should be okay; it will probably continue to set up while cooling on the rack and chilling in the fridge. But, most likely, it will appear pretty solid with the one hour baking time. Cool completely on cooling rack, then continue to chill for a few hours in the refrigerator.
For the frosting: When the cake is completely cold, remove from the refrigerator, and place the pan on a serving platter. Take a butter knife and gently run it along the edge of the cake to loosen any last parts of the cake from the pan. Remove the sides of the springform pan. Now, it's time to prepare the frosting. Melt the rest of the chocolate squares (6 oz.). Put in a small mixing bowl and add the sour cream. Mix well. Use a spatula or a non-serrated butter knife to spread the frosting on the top and sides of the cake. The sour cream adds just enough softness to the chocolate to spread it but leaves the chocolate firmer than regular cake frosting. Place back in the refrigerator and continue to chill for at least an hour before serving. Can be served cold from the fridge or after setting out for about twenty minutes. Longer than that can make the cake too soft. If you find that the crust is wanting to stick to the bottom of the pan, gently run a butter knife under the crust all the way around, to loosen it from the pan. This has only happened to me once, though. This is so good. Feeds five hungry vegans and several relatives.
Friday, April 22, 2011
Beet Feast
I've been on a beet kick lately. I tried planting my own, but only one survived the frost, and then that one was dug up by the pups. So, I've been buying them left and right at the store. When I grew up, I only knew about beets in a can, and I liked them enough. I never would have voluntarily added them on at a salad bar or chosen them as a veggie to eat, but every now and then, when Mom would pop open a can, they were okay. I was in my twenties before I saw fresh beets with their greens, and it wasn't until after I had children that I tried to make them. I never bought them with their greens attached, just the detached bulbs instead. Who knew what to do with those greens? (G, of course, loves beets, could eat them all day, and they are always the most substantial part of his salads when we go to salad bars. SR has taken right after her dad: she loves them, as well. JK has good beet days and bad beet days, you just never know. GR is usually satisfied with most things I serve - she's the easiest.) So, a couple of years ago, I tried to start cooking their greens. Still wary of most greens, if you remember my iceberg lettuce and canned spinach days I grew up with, I wasn't the best greens preparer at first. Anyhow, now I've become brave with beets and their greens. I'm experimenting with different ways of cooking them, and below is not SR's favorite way, but it is by far the easiest. However, there aren't enough beet greens with the beets to feed my family, so I supplement with other greens to make a lush dish. I find the flavors of the mixed greens blends well. There are more than just the red beets around, so I've been having fun with a small beet rainbow. Here is an example of one of our meals with beets as its centerpiece. On the plate, timidly in the background, is a scoop of great northern beans trying to assert itself.

Beet Feast
Ingredients:
6-7 Gold beets, ends trimmed, peeled and cut into wedges
6-7 Red beets, ends trimmed, peeled and cut into wedges
The attached beet greens, stripped from their stems, washed and chopped
2 bunches of kale, stripped from their stems, washed and chopped or 8-10 cups chopped kale
1-2 Tbs. olive oil
Salt and pepper to taste
Directions:
Place prepared beets in pot of water. Bring to a boil, and boil for fifteen minutes. Drain. In a large skillet, heat a tablespoon of the oil. When hot add the greens a big handful at a time. When slightly wilted, add another big handful, until all the greens are in the skillet. If the greens are drying out and not really cooking, add the second tablespoon of oil. Season with salt and pepper as desired. Greens are done when they are slightly wilted but still have a bright green color. Serve alongside of beets. Mm-mmm. Feeds five hungry vegans.

Beet Feast
Ingredients:
6-7 Gold beets, ends trimmed, peeled and cut into wedges
6-7 Red beets, ends trimmed, peeled and cut into wedges
The attached beet greens, stripped from their stems, washed and chopped
2 bunches of kale, stripped from their stems, washed and chopped or 8-10 cups chopped kale
1-2 Tbs. olive oil
Salt and pepper to taste
Directions:
Place prepared beets in pot of water. Bring to a boil, and boil for fifteen minutes. Drain. In a large skillet, heat a tablespoon of the oil. When hot add the greens a big handful at a time. When slightly wilted, add another big handful, until all the greens are in the skillet. If the greens are drying out and not really cooking, add the second tablespoon of oil. Season with salt and pepper as desired. Greens are done when they are slightly wilted but still have a bright green color. Serve alongside of beets. Mm-mmm. Feeds five hungry vegans.
Subscribe to:
Posts (Atom)