Pages

Thursday, April 28, 2011

Grilled Cheese and Tempeh Facon Sandwiches

Here is another twist on the grilled cheese sandwich. In the past I used Smart Bacon strips, and there's nothing wrong with them as an alternative to bacon. But, I'm trying to get away from processed/pre-made foods more and more, little by little, so I thought I'd just make a simple version of facon with tempeh. I will still use Smart Bacon and other meal-helpers in dishes, don't get me wrong - I'm not going to be hypocritical. But, for this sandwich, tempeh worked great, and I like knowing my family will reap the health benefits as well.


Grilled Cheese and Tempeh Facon Sandwiches with roasted veggies on the side


Easy sandwich preparation


Grilled Cheese and Tempeh Facon Sandwiches

Ingredients:

2 pkgs. of tempeh, cut into strips
2 tsp. of liquid smoke
1 Tbs. canola oil
Follow Your Heart vegan cheese, cheddar style, cut into strips
Vegan margarine
Good bread

Directions:

Heat the oil in a large skillet that has a lid (but don't use the lid yet) over medium heat. Put tempeh strips in a shallow bowl and sprinkle the liquid smoke over them. Toss the tempeh carefully with your hands to get the liquid smoke over as much of them as possible; you can massage it in gently. Fry the tempeh strips for several minutes until golden on both sides (do not use the lid here). Drain on paper towels to get any extra oil off. Put cheese slices on bread, and cover each slice with a strip of tempeh. Top with the other slice of bread. Spread margarine on the top slice of bread. Add about a tablespoon or so of margarine to the same skillet, and put in each sandwich unbuttered side down. Cover with lid and cook for five minutes over medium heat. Carefully flip each sandwich over with a large spatula, so the margarine side is down now. Cover with lid again, and cook for another five minutes. Serve while warm. Can be served with a hearty salad or lots of veggies on the side. Tasty. Feeds as many as you want, which is of course, five hungry vegans!

Monday, April 25, 2011

Black Tie Cheesecake

I call this Black Tie Cheesecake because it looks like it's all dressed up to go to a black tie event. I've made this cake about once a year for around the last ten years, and I love it every time. Whenever I am going to make it, I always think it's a big job, but then when I'm done, I always remember how easy it actually is. Then, I think, I should make this more often but never do. So now, perhaps by putting this all down here, maybe I'll actually make this delicious cheesecake more often. I first got the idea for the recipe off a free recipe card that was mailed to me, trying to get me to subscribe to recipe cards. I've veganized the recipe, changed the name, altered the amounts of the ingredients, and also tweaked some of the procedures of the recipe, as well, over the years. I'm confident that I can call it mine now.

I brought this as our contribution to Easter with all the relatives, along with my Tropical Seitan Pasta Salad, which has become pretty much the dish that everyone expects me to bring now: they love it so much. My mom provided Gardenburger riblets for us, and I also brought rolls. I once made the salad with something else for dinner for my parents, along with this cheesecake for dessert, and my dad told my mom later that that was one of the best meals he had ever had. From my dad, that's a huge compliment. I hope you enjoy this basically easy, but beautiful dessert, as well.


Black Tie Cheesecake


Cookie Crust


White layer of the cheesecake


Getting ready to mix in the chocolate into the second half of the white cream cheese blend


Chocolate layer of the cheesecake


Here the baked cheesecake has been cooling for about twenty minutes. You can see that the edges are already starting to pull away from the pan. When it's completely cool, you will gently run a butter knife around the edge to ensure that it's separated all the way.


Preparing to mix in the sour cream into the melted chocolate to make the frosting


Here is the cheesecake with the sides of the springform pan removed. The frosting is patiently waiting to be spread.


The frosted cheesecake - ready to be chilled in the fridge


What was left of the Black Tie Cheesecake after the relatives got ahold of it


Black Tie Cheesecake

Ingredients:

Crust:

1 pkg. Newman O's chocolate sandwich cookies
1/2 cup of vegan margarine

Cheesecake:

3 pkgs. of Tofutti cream cheese, room temperature
1 cup of vegan sugar
3 Tbs. EnerG Egg Replacer
10 Tbs. water
1 8oz. box of Bakers semi-sweet chocolate, divided (2 oz.)

Frosting:

The remainder of the Bakers chocolate (6oz.)
1/2 cup of Tofutti sour cream

Directions:

For the crust: Scrape all the cream centers out of each cookie and set aside for a later meal or for present gluttony. Grind the chocolate cookie "jackets" in a food processor. Melt the margarine. Combine them both in a bowl and mix well. Press into the bottom of a nine-inch springform pan. Smooth out with the back of a spoon.

For the cheesecake: Preheat the oven to 325 degrees. In a mug or measuring cup, whisk together the Egg Replacer and water with a fork or small whisk. In a medium bowl, combine the cream cheese, sugar, and Egg Replacer and water mixture. Beat on medium speed until well blended, two to three minutes. Pour half of the mixture over the cookie crumb crust. Melt two wrapped squares of the chocolate. Stir into the rest of the cheesecake mixture in the bowl. Pour evenly over the white bottom layer in the pan. Place pan on cookie sheet, and bake for one hour. Remove from oven. You don't want any cracks in the top of the cake: that could mean that it is too dry. If it's a little jiggly in the center, that should be okay; it will probably continue to set up while cooling on the rack and chilling in the fridge. But, most likely, it will appear pretty solid with the one hour baking time. Cool completely on cooling rack, then continue to chill for a few hours in the refrigerator.

For the frosting: When the cake is completely cold, remove from the refrigerator, and place the pan on a serving platter. Take a butter knife and gently run it along the edge of the cake to loosen any last parts of the cake from the pan. Remove the sides of the springform pan. Now, it's time to prepare the frosting. Melt the rest of the chocolate squares (6 oz.). Put in a small mixing bowl and add the sour cream. Mix well. Use a spatula or a non-serrated butter knife to spread the frosting on the top and sides of the cake. The sour cream adds just enough softness to the chocolate to spread it but leaves the chocolate firmer than regular cake frosting. Place back in the refrigerator and continue to chill for at least an hour before serving. Can be served cold from the fridge or after setting out for about twenty minutes. Longer than that can make the cake too soft. If you find that the crust is wanting to stick to the bottom of the pan, gently run a butter knife under the crust all the way around, to loosen it from the pan. This has only happened to me once, though. This is so good. Feeds five hungry vegans and several relatives.

Friday, April 22, 2011

Beet Feast

I've been on a beet kick lately. I tried planting my own, but only one survived the frost, and then that one was dug up by the pups. So, I've been buying them left and right at the store. When I grew up, I only knew about beets in a can, and I liked them enough. I never would have voluntarily added them on at a salad bar or chosen them as a veggie to eat, but every now and then, when Mom would pop open a can, they were okay. I was in my twenties before I saw fresh beets with their greens, and it wasn't until after I had children that I tried to make them. I never bought them with their greens attached, just the detached bulbs instead. Who knew what to do with those greens? (G, of course, loves beets, could eat them all day, and they are always the most substantial part of his salads when we go to salad bars. SR has taken right after her dad: she loves them, as well. JK has good beet days and bad beet days, you just never know. GR is usually satisfied with most things I serve - she's the easiest.) So, a couple of years ago, I tried to start cooking their greens. Still wary of most greens, if you remember my iceberg lettuce and canned spinach days I grew up with, I wasn't the best greens preparer at first. Anyhow, now I've become brave with beets and their greens. I'm experimenting with different ways of cooking them, and below is not SR's favorite way, but it is by far the easiest. However, there aren't enough beet greens with the beets to feed my family, so I supplement with other greens to make a lush dish. I find the flavors of the mixed greens blends well. There are more than just the red beets around, so I've been having fun with a small beet rainbow. Here is an example of one of our meals with beets as its centerpiece. On the plate, timidly in the background, is a scoop of great northern beans trying to assert itself.


Beet Feast

Ingredients:

6-7 Gold beets, ends trimmed, peeled and cut into wedges
6-7 Red beets, ends trimmed, peeled and cut into wedges
The attached beet greens, stripped from their stems, washed and chopped
2 bunches of kale, stripped from their stems, washed and chopped or 8-10 cups chopped kale
1-2 Tbs. olive oil
Salt and pepper to taste

Directions:

Place prepared beets in pot of water. Bring to a boil, and boil for fifteen minutes. Drain. In a large skillet, heat a tablespoon of the oil. When hot add the greens a big handful at a time. When slightly wilted, add another big handful, until all the greens are in the skillet. If the greens are drying out and not really cooking, add the second tablespoon of oil. Season with salt and pepper as desired. Greens are done when they are slightly wilted but still have a bright green color. Serve alongside of beets. Mm-mmm. Feeds five hungry vegans.

Tuesday, April 19, 2011

Calzones

Calzones, mmm. The last time I had one, I was definitely not vegan. Maybe I was vegetarian, but I just can't remember. Anyhow, ever since I've been vegan (15 years now), I haven't had a calzone, and that just had to change. So, since I'm such a whiz at making my own pizzas now :-), I decided to go head-first in trying my hand at calzones. Now, I have yet to actually look at any recipes for calzones. I thought, Pizzas, I can make pizzas, therefore, I can make calzones. So, that's what I did. I have no idea if my recipe is authentic or not, but it sure worked for me, and for my children, who've never had calzones, loved them, and that's good enough for me. I started with my pizza dough, added some fillings, and voila, five calzones! Yay for us! Easy as pizza pie - give it a try.


A hot, steamy calzone, cut in half, and ready to be consumed


A ball of soft dough on a floured surface


Dough rolled out just larger than a dinner plate


Filling up the calzone with goodies


Calzone ready for the oven


Just out of the oven, resting before being cut in half

Calzones

Ingredients:

Your favorite pizza dough, or you can use my recipe (link above) - If you use mine, it's large enough to divide into five balls of dough
Extra flour for rolling dough
Your favorite toppings - we used:
Organic pizza sauce
Follow Your Heart Vegan Cheese - cheddar style, finely grated
Gimme Lean Sausage, made into small meatballs and sauteed
Kale, torn into pieces
Fresh pineapple, diced small
Black olives, sliced into thirds

Directions:

Preheat oven to 400 degrees. Divide dough into five sections. Shape a section into a ball. On a floured surface, roll out each section into a circle a little larger than a dinner plate. Do NOT toss the dough, as you would for an actual pizza. To ensure a round shape, start at the center of the dough, and roll to the edge, all around. Turn the dough as needed to keep it as uniform as possible. Spread your pizza sauce all over the rolled out dough, keeping the edges clear of sauce about one inch. Sprinkle your cheese on sauce. Add your other toppings on one half of the sauce and cheese. Fold the half of the dough over that doesn't have all the extra toppings on it. Pinch the edges together to seal it shut. Press fork all across the sealed edge to further crimp and seal it, and it gives it a nice look, too. Make four short slits on top to release some of the steam while baking. Bake each calzone for 20 minutes. Let rest for five minutes before eating or cutting in half. Makes huge calzones that you can eat alone for dinner, and maybe have some left over for lunch the next day. Feeds five hungry vegans.

Saturday, April 16, 2011

Roasted Veggies

Roasted veggies, you say? Well, I decided to do a post on this wonderful way of preparing vegetables because just as no one is born knowing how to blanch veggies (and some people have mentioned their thanks to me that I've written brief notes on how to do that), so also is no one born knowing how to roast them either. So, this is more of a short guide, rather than a recipe. By the way, I only began roasting vegetables regularly about a year ago. I usually steamed or stir-fried them, but now I think roasting is my favorite way to prepare them. Below is my all-time favorite combination of veggies to roast: asparagus, broccoli and mushrooms - and they all fit so nicely on a large cookie sheet! Have fun roasting!


Hot Roasted Veggies right out of the oven - see the steam?


A close-up of said veggies

Roasted Veggies

Ingredients:

Several cups of your favorite vegetables, chopped or left whole, according to your preference
Non-stick Spray
Olive Oil
Salt and Pepper to taste

Directions:

Preheat oven to 400 degrees. Spray a cookie sheet with non-stick spray. Spread out your prepared veggies over the cookie sheet. Drizzle about a tablespoon of olive oil over the vegetables, less or more depending on your taste. Sprinkle salt and pepper over all. I have found to keep seasonings to a minimum: when I used more herbs and spices, it hid the flavor that the roasting brings out. Bake for fifteen minutes. If you have harder vegetables, like cauliflower, you may need to bake for an additional ten minutes. You do not want them mushy when done, yuck - just barely fork tender, leaving a nice crunch. Mm-mm-good. Feeds five hungry vegans.

Tuesday, April 12, 2011

Seitan Fajitas

Fajitas are a food that I like to keep as simple as possible, in order to enjoy each of the prominent flavors. I used mainly just water, gluten flour and spices to make this version of seitan because I wanted a firmer texture for this meal. I believe you'll like the combination of spices and veggies that I put in, but whatever veggies you choose to use, I recommend to use just a couple. Hope you enjoy this as much as we did!


The finished fajita, opened up for you.


The seitan before it's steamed.


The seitan after steaming: see how much it expands. The foil will stretch to accommodate it, but you need to be sure you've wrapped it around at least twice, in order to ensure that it won't leak out of a seam. This makes a lot of seitan, so you can have leftovers!

Seitan Fajitas

Ingredients:

3 cups of gluten flour
1 Tbs. paprika
1/2 Tbs. oregano
1 Tbs. onion powder
1 Tbs. garlic powder
1 tsp. salt
1/4 tsp. pepper
2 and 1/3 cups of water
Canola oil

Homemade or store bought flour tortillas
1 bunch or several asparagus, trimmed and blanched
2 tomatoes, halved and sliced
Hot sauce

Directions:

In a large bowl, whisk together the gluten flour with all the spices. Add the water and stir well. Knead for a minute or two to completely combine everything - you want no wet or dry spots. Shape into a ball or loaf, and wrap securely in aluminum foil. Steam in a large pot with a steamer basket and a couple of inches of water on the bottom over medium heat for one hour. Carefully unwrap, so you don't get steam burns. Let cool long enough so you can handle it to slice it in three-inch strips. (You can save some of the seitan for a later dish: unless you are serving a large dinner party, you probably won't need this whole loaf at one time. However, feel free to cut the whole thing into strips and saute and freeze what you want.) Heat a large skillet with about a tablespoon of oil over medium heat. When hot, add several of the strips and cook for about one minute on each side, until browned. If you are cooking a large amount of the loaf, or the whole loaf, add more oil as necessary. Make sure the asparagus and tomatoes are prepared. To blanch asparagus, heat a large pot of salted water to boiling. Add the asparagus and boil for three minutes. Drain under cold, running water for just a moment to stop the cooking process. You're not interested in getting it completely cold. Fill a flour tortilla with seitan, asparagus and tomatoes, and douse it liberally with your favorite Mexican-style hot sauce. Fold over like a taco. Bite. Yum. Feeds five hungry vegans.

Friday, April 8, 2011

Review: Sun Chlorella USA

Over a month ago I was contacted by a representative from Sun Chlorella USA asking if I would be interested in sampling some of their products for a review. After reviewing their website (www.sunchlorellausa.com), I thought it would be a useful thing to do. I'm not big on supplements, but G definitely is, and I knew at the very least that he would enjoy from and possibly benefit from these products.

So, they sent me regular sized boxes of their 200mg tablets and of their granules. They also sent me samples of the former two, as well as of their 500mg tablets, their facial cream, their tea, and their Wild Sun Eleuthero tablets. Right away, G inspected everything and looked up all their information online, even though they sent a bit of info along to us. He was impressed with the promoted benefits and planned on completing the full supply of the 200mg tablets and the granules. I was to share the samples with him, which was okay with me. The girls grabbed at the tea, but when I took the cream, they both claimed unfairness and said that since there were six packets, that they should be evenly divided. When I announced my age and said I deserved the cream, a general mutiny and a flurry of grabby hands ensued. It was only when they realized it was facial cream and not vegan cream for coffee that they quickly relented. I scurried into the bathroom with my booty. So, see below some fascinating pictures, along with our family's general review of Sun Chlorella USA.


What came in the box from Sun Chlorella USA

You can see the packets of cream on the right. They are single use packets, and I used them both morning and night. They had a slight green hue, which didn't bother me nor transfer to the skin. I wished the cream had been "creamier" and wasn't overall impressed or unimpressed with it - sort of meh.


I'm holding the 500mg tabs, and G is holding the 200mg tabs.

What is in each of our hands, is meant to be a daily serving. Since I am already not big on supplements, taking six huge pills or fifteen smaller pills did not appeal to me at all. G can somehow put an infinite number of items in his mouth and swallow it down with a teaspoon of water. Even though he doesn't mind taking supplements, even he was a little surprised at the daily requirement of these guys. However, although I didn't see any change in my energy or overall health, G said he did.


GR drinking the Wild Sun Eleuthero Natural Herb Tea (ignore the coffee stain on the counter)

Both girls seemed to like their tea. I had a taste and thought it was strong, but I'm not much of a tea drinker. They both added agave nectar to theirs and drank up. For the record, little JK did not like the tea, but that wouldn't be surprising.


Sun Chlorella Granules

I sprinkled my sample of their granules on my cereal one day and mixed it in. It definitely added an earthy flavor to it, not unpleasant. No healthy side effects noted. G, on the other hand, took his full box and poured a day's worth in his daily drink concoction that he stirs up and just guzzled it down with everything else. He again noted increased vitality. Hmm.
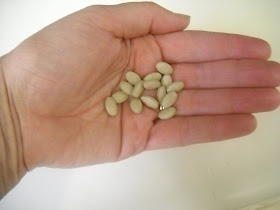

Wild Sun Eleuthero Dietary Eleuthero Supplement

Again, what's in my hand is the daily requirement. They sent us three packets, or three days' worth, of this. I don't even know what eleuthero is, and I couldn't tell the difference between this and the other tablets. But, I popped them down. You can all guess what G thought, by now.

To give you an idea of what we ingested for several weeks, the tablets and granules are pulverized cell-wall chlorella, and the eleuthero has eleuthero root and a bunch of unpronounceable things. You can purchase directly from their site or places like Amazon. They are not cheap, but not extremely expensive. A 20 day supply runs over 30 dollars, but if two or more people are taking it, then it becomes costly pretty quick. There are other products on their site, as well, ranging in price from medium-high priced to very highly priced.

So, in the end, G did most of the research. He did note that even though he thought they were a good product and offered health benefits, the sheer number of things to swallow and the price of the products would not appeal to some people. Being a single-income family, the only time we'll indulge in Sun Chlorella USA products is when they send them to us for free. Check out their site and see what you think!

Sunday, April 3, 2011

Wok Tofu Stir-Fry with Sesame Oil

Hi, Everyone! I'm following a couple of tips I found on the forum, and I'll know when I view my post, if they helped me with my blogger problem. Update: Okay, I've just previewed my post, not published, and it looks okay. I've done everything in html. Apparently, viewing it in Compose loses all my coding. The problem is, and I'll deal with it, that now I have to enter in coding in html. I can't find an html code for underlining, so my recipe titles will be bolded until further notice. Next, I'll see how it publishes - I guess we all will. :-)

So, I don't normally go into a lot of detail about what's going on with me personally - I usually just stick with the food. But, I've got a running theme here at home that I thought might be of interest to you. We've set up a small infirmary in the living room for all the human patients. Hmm, where to start? Well, let's start with the four-legged creatures. Now, the pups aren't sick, but they are currently getting all their vaccines and preventative shots. No big deal. Then, you add in Sparkly, the cranky kitty, who is currently wearing a cone almost full-time due to a chronic ear infection and needs meds throughout the day to knock it out. In January, SR was pushed into a door by a bully that's been harassing her for over a year and a half. She's had two casts and is now wearing a brace indefinitely on her arm until her problem is resolved. We don't know what exactly is going on with her: she could have a torn cartilage, a wrist fracture, nerve damage, or just a "general pain experience" as her physical therapist suggested (until we know more, that is). On Thursday, G tried to mow the lawn, but mowed his big toe instead. We were in the ER on Thursday and two hospitals on Friday. He's lost some of the top of his toe, the front of his toe, his toe is broken, and the bone is exposed. He likes to say he's not going to be a foot model anymore, and he also likes to say that he got a pedicure from his lawnmower. But, seriously, the guy's in major pain. He's on pain meds and antibiotics, and I've got him on an antibiotic-resistant probiotic, an herb for crushed toes, and an herb for nerve damage. And, finally, yesterday JK got the flu. My little guy has been expunging out of both ends, and can't even keep water down. That leaves GR and me and our kitty, Charlene, left. Help?

So, can you believe I still find time to cook? Well, this was actually made before the toe incident; I've been taking it easy on the meals the last few days. I'm sure everyone has done stir-frys (is that the plural?), so I'm probably not offering a bunch of new ideas. I just have a tip for doing it in the wok. Woks are not meant to contain bunches of food at one time. So, if you have a large family, or if you're making a particularly large stir-fry, do it in batches. In my directions below, I outline how I did mine, and I hope this helps you. I actually took pictures of my method for making tofu triangles, due to many requests, but they didn't turn out, so I will try again in a later post.


Wok Tofu Stir-Fry with Sesame Oil

Ingredients:

Sesame Oil
2 pkgs. extra-firm tofu, drained and cut in triangles
1/2 red bell pepper, sliced in half width-wise and cut into strips
1/4 head cauliflower, chopped
2 stalks of broccoli with florets - stalks sliced thinly, and florets chopped
1/4 head of Napa cabbage, sliced width-wise and sliced thinly
6 asparagus spears, sliced on the diagonal
1/4 cup of soy sauce
1 cup of water
2 Tbs. corn starch
1 Tbs. fresh ginger, minced

Directions:

Have all your tofu and veggies chopped and sliced before you begin. Heat about a tablespoon in the wok over medium-high heat. After about a minute, test the heat with a piece of tofu. When oil is ready and simmers the tofu, add a quarter of the tofu (or 1/2 a block) to the wok. Cook for about three minutes, stirring fairly frequently, until tofu has browned. Remove to a large bowl. Add a little bit more oil to the wok and another quarter of the tofu and do the same thing as with the first batch of tofu. Cook the rest of the tofu in this manner. *[Next, you are going to cook the veggies in order from firmest to softest, or longest-cooking to quickest-cooking. You will add a bit of oil to each addition, as there won't be any oil left in the wok. The exception will be if you have a non-stick wok. I do not, so my food will burn. I have tried cooking with water in a wok, but that definitely did not turn out well. If you find that there is oil left on your food, drain on paper towels.]* Add the cauliflower and cook for about three minutes, stirring frequently. Add the bell pepper and broccoli to the cauliflower and cook for another three minutes, again stirring frequently. Remove to bowl with the tofu. Add a bit of oil to the wok and add the cabbage and asparagus. Cook for three minutes and stir. Add all the tofu and veggies back into the wok. Whisk together the soy sauce, water, corn starch and ginger. Pour over the wok goodies and stir constantly for about one minute, until it's slightly thickened. Serve over brown rice. Mm-mmm. Feeds five hungry vegans.